
Overview
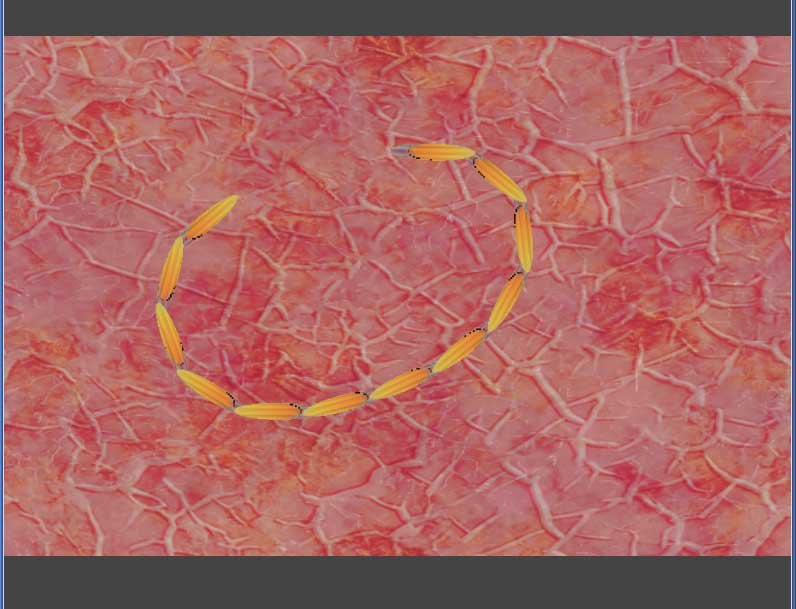
At the end, this is what we're trying to make. Drag the mouse or you finger around and watch the worm and all its segments follow you around. I'll be breaking the project down into 5 steps. Each step will have its own html file and JavaScript file for you to look at for additional details.
Step 1 - lay down the basics
We will be doing this using WADE as a framework rather than through the online editor, so we start by laying down some boilerplate code. This involves setting up some global app variables and the wade load and init functions.
Next, create a simple shader and load it. This shader will scroll a background texture and give it a little undulation. I use the jquery.get() function to load in and then parse the shader string. Doing it this way, allows me to write the .fs (fragment shader) file just like any other javascript file with block and inline comments. I find this much easier to work with and the comments help me remember what the shader is doing. Take a look at the backgroundShader.fs to see what the various variables are doing. Play around with values if you want to change how the background moves.
Lastly, create a background object with a background sprite that uses the background shader, (sorry, naming conventions can get a little redundant).
Run the step1.html file and you should see this background with some slight motion. The relevant javascript code is in step1.js

Step 2 - One rotating segment
To create the worm, start by creating one segment that rotates to the mouse position.
The worm segments will have their own shader. This shader is almost identical to the shader Gio posted for the rotating globe blog post. The loadShaders function is modified with the addition of the segment shader. These are added separately, because the jquery.get() routine is asynchronous and so I don't use a single call with passed in file and string parameters.
For now, the creation of the segment scene object will be done in the main app. Later this will be moved to a separate behavior file. Lastly, add an array called worm that will be used to hold the segments so they can be referenced in the future.
To rotate the segment towards the mouse, implement an onMouseMove function in the main app. The steps in brief are convert the mouse position to world coordinates, get the x and y distance between the mouse and the worm. Set the scene objects rotation to Math.atan2(dy,dx).
		this.onMouseMove = function(eventData) {
			var sToW = wade.screenPositionToWorld(self.GAME_LAYER,eventData.screenPosition);
			var pos = worm[0].getPosition();
			var dy = sToW.y - pos.y;
			var dx = sToW.x - pos.x;
			worm[0].setRotation(Math.atan2(dy,dx));
		};	// end onMouseMove
Run the step2.html file and you should see one worm segment that rotates to the mouse position. The relevant javascript code is in step2.js

Step 3 - Create a segment behavior
The final worm will be made up of multiple segments. So, it would probably be a good idea to create a behavior for the repeatable functionality.
Create the separate segment behavior file and add the sprite with shader creation code to that file's onAddToScene function. In the main app, add the getSegmentShader() function so you can access the segmentShader string. Additionally, the segment behavior will contain some segment specific variables and some small routines to get offset positions of the front and back of the segment scene object. These offsets will be used to connect and move the worm segments in a head to tail order.
Over in the main app, I've modified the createSegment function to use the new behavior
		this.createSegment = function() {
			var segment = new SceneObject(0,Segment);
			wade.addSceneObject(segment);
			worm.push(segment);
		};	// end createSegment
Another modification to the main is the addition of a moveWorm function. It is simply the code from the onMouseMove with the addition of two lines. The first gets the position of the front side of the segment, np stands for node position. The second line is a call to move the scene object to a position offset by its front node.
		var np = s.getBehavior().getFrontOffset();
		s.moveTo(wp.x-np.x,wp.y-np.y);
The last modification to the main involves a change to the onMouseMove function. Now, simply convert the mouse position to world coordinates and call moveWorm() with those coordinates.
Run the step3.html file and you should see one worm segment that rotates and them moves to the mouse position. The relevant javascript code is in step3.js and segment3.js (the behavior file).
Step 4 - Extend motion to two segments
The next step is to extend the functionality to two segments. The first segment will rotate and move to the mouse as in step 3. The second segment should rotate and move to the tail end of the first segment. If you can do 2 links, then you can do 20. Every next link just moves and rotates to the tail end of the link in front of it. This is the reason for adding those get offset functions to the segment behavior file. It is also the reason for pushing the segments into the worm array.
When the mouse moves, I call moveWorm() like before. I move the first segment worm[0] to the mouse postion offset by worm[0]'s head position. Then, I use a for loop to go through the next n segments (in this case n = 1). So, worm[n] will rotate to where worm[n-1]'s tail is and then worm[n] will move its' head to worm[n-1]'s tail. I hope that made sense. If not, please look at the moveWorm() function in step4.js.
Run the step4.html file and you should see 2 worm segments that rotates and move to the mouse position. The relevant javascript code is in step4.js and segment3.js

Step 5 - Add a little more life
After making the worm, I wanted to make it a little more lifelike. I thought that if the segments 'pulsed' in width, it would seem a little more alive.
To do this, I take advantage of the built in onUpdate function. First, when a segment is added to the scene, make sure the scene object will listen for events by setting the second parameter to true.
wade.addSceneObject(segment,true);
Now in the segment behavior, write a function to listen for the onUpdate event and then call a function
		this.onUpdate = function() {
			self.pulse();
		};	// end onUpdate
Finally, write the pulse function that varies the segment sprite width based on the sine function. The frequency is 'seeded' with a random value on when the segment is added to the screen so the segments pulse at slightly different rates.
		// simply vary the width of the segment sinusoidally (is that a word?)
		this.pulse = function() {
			var sp = self.owner.getSprite();
			sp.setSize(length,width+width/2*Math.sin(frequency));
			if (frequency > 2*Math.PI) {frequency = 0; }
			else ( frequency += 0.01)
		};	// end pulse
This final version is the same code that is running in the iframe at the top of this page. The relevant javascript code is in step5.js and segment5.js
It may not be bleeding edge, but you can still do some fun stuff with simple math and shader code. I hope you enjoyed this post.
This post was published here with permission from Shri of Ashatej Software.

