
Overview
If you haven't read my previous post, I would start from there as this will be a direct continuation of it.
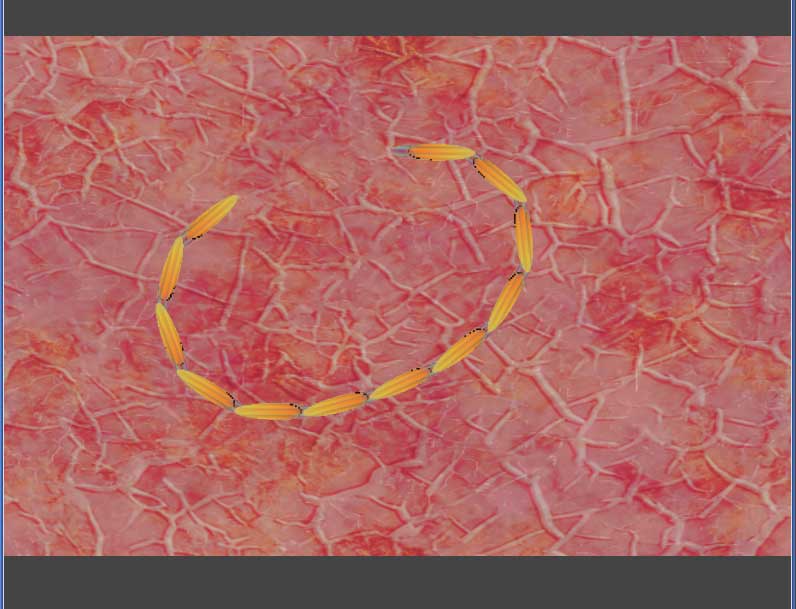
At the end, this is what we're trying to make. With the mouse or your finger, drag the worm around and eat the falling food particles. If you eat enough, the worm will grow another segment. I'll be breaking the project down into 5 steps. Each step will have its own html file and javascript file for you to look at for additional details.
Step 6 - Setting Up
Oops, from the previous blog, I discovered an error I made in the segment behavior file regarding the sprite layer. Make sure the line in the segment sprite creation in onAddToScene looks like this:
layer: wade.app.GAME_LAYER,
Or else, when I get to the collision stuff later on, you will be scratching your head wondering why scene objects aren't registering their collisions. We now return to our regularly scheduled program.
Continuing from the previous blog, I'll begin with the two javascript files I ended with step5.js and segment5.js.
The first thing I want to do is add a attribute so I can identify a segment. In the segment behavior, onAddToScene, add this line.
self.owner.isSegment = true;
Now, back in the main, I am going to rename createSegment to initWorm and make a couple of modifications. For one, I am going to pass in a parameter so that I can initialze the worm with any number of segments. The second modification I am going to make is to add a line so that the first segment, worm[0], is identified as the head of the worm.
worm[0].isHead = true;
Run the step6.html file and it looks like I've gone backwards with only 1 segment rotating and following the mouse. The relevant javascript code is in step6.js and segment6.js
Step 7 - Adding Segments with the Keyboard
Wait, I thought segments were going to be added when the worm eats stuff! Well yes, that's where I will get to eventually.
When adding new functionality to code, especially in games, it is a good idea to add it in predictable chunks. So, instead of implementing the add segment code and the add food code and the count if eaten enough food to add a segment code and has the worm hit a piece of food, and ... I will break it down into manageable pieces and integrate them one at a time after I know the individual pieces work correctly.
To that end, I will first add this routine to the main. It listens for the keydown event, and if the letter 'a' (65) is pressed, then call add segment.
this.onKeyDown = function(eventData) {
	if (wade.isKeyDown(65)) {
		console.log('a pressed - add segment');
		self.addSegment();
	}
}	// end onKeyDown
Then, add the addSegment function, which is almost identical to the initWorm function. Don't set the isHead property because the worm already has a head. More importantly, add code similar to moveWorm() so the new segments immediately hook onto the existing segments. If you don't do this, the new segments will sit in the center of the screen until you move the mouse. Lastly, I've added a maxSize variable which is checked so you can't go crazy and add 1000 segments.
Run the step7.html file. Press the 'a' key to add segments one at a time. If you modify the addSegment() call, you can add multiple segments each time the letter 'a' is pressed. If you want to see more than 12 segments, then modify the maxSize variable so it is larger. The relevant javascript code is in step7.js

Step 8 - Add Food with the Keyboard
Next, I am going to do the same thing for adding food. Add the following lines to the onKeyDown function so that food is added when the 'f' key is pressed.
else if (wade.isKeyDown(70)) {
	console.log('f pressed - add food');
	self.addFood();
}
The sprite part of the addFood function will be similar to adding the background. I'll load an image and reuse the worm segment shader. To test things out, food will be added at the top of the middle of the screen and simply drop to the bottom. Once the food particle exits the screen bottom, it will be deleted using the onMoveComplete function. In a later step, I'll change the motion of the food and where it starts, but for now, to get things up and running, use this simple case.
// create food particles
this.addFood = function() {
	console.log('add food');
	var yPos = -1 * self.GAME_HEIGHT/2;				// start at top of screen
	var xPos = 0;									// always start in middle for now
	var pSize = 24;									// the particle size
	var fSprite = new Sprite(
			{
				layer: self.GAME_LAYER,
				autoResize: false,
				image: './images/food.jpg',
				alwaysDraw: true,
				pixelShader: segmentShaderString,
				size: {x: pSize,y: pSize}
			});
	var particle = new SceneObject(fSprite,0,xPos,yPos);
	particle.moveTo(xPos,-1*yPos,200);				// move to bottom of screen
	particle.isFood = true;							// for collision checking
	wade.addSceneObject(particle);					// add the scene object

	// on move complete triggered when food particle reaches bottom
	// of game screen. simply remove it for now
	particle.onMoveComplete = function() {
		console.log('remove food particle');
		wade.removeSceneObject(this);
	};	// end bullet on move complete

};	// end addFood
Run the step8.html file and you should see one worm segment that rotates and them moves to the mouse position. Press the 'a' key to add segments to the worm.. Press the 'f' key to drop spinning globes of food. The relevant javascript code is in step8.js

Step 9 - Collisions and Growing Worm
Now that I know I can create the worm, move it around, add segments and drop food successfully, I'll add some collision code. The objective is to delete a food particle if it collides with the head of the worm.
The first step to doing this is to catch collisions between the worm's head, worm[0] and food particles. Add the gameManager function to the main. The two critical lines are
var overMouth = worm[0].getOverlappingObjects();
...
if (overMouth[i].isFood) {
The first line uses wade to get an array of scene objects that overlap the worm's head. The second line checks to see if the scene object over the worm's head is a piece of food. After adding the gameManager function, make sure it gets kicked off by adding this to the startDemo function
wade.setMainLoopCallback(self.gameManager, 'gameManager');
The second part of this step is to add a worm segment when some food is eaten. I'll first define two variables. One called fullStomach and set it to 3, the other called stomach which is initialized to 0. Then in the eat function, they are used like this.
// called when worm head collides with food
this.eat = function(particle) {
	console.log('eat');
	if (particle) {
		wade.removeSceneObject(particle); 		// remove the food particla
		++stomach;								// add to stomach
		if (stomach >= fullStomach) {			// is the worm full
			self.addSegment();					// if it is, then add a segment
			stomach = 0;						// reset the stomeach
		}	// end if full stomach
	}	// end if particle
}	// end eat
Run the step9.html file. Move the worm around, hit the 'f' key and eat the particles. Once you eat 3 pieces of food, a new segment is added to the end of the worm. The relevant javascript code is in step9.js
Step 10 - Automatic Food Drop
To wrap up this post, I'm going to set up some simple code to drop food at a randomized interval.
Remember earlier in the post I said, 'When adding new functionality...'
Well, another good thing to think about when making a game is building it in separate modules. You then put these independent pieces together to make the whole project. To that end, the food dropping code will be in a separate AIManager file.
Now I know your thinking ai - as in artificial intelligence? Well, yes, not in the sense of what google is doing with self driving cars, but it will be an automated method for dropping food. Plus automated randomized food dropper and future enemy steering manager was way too long of a name. So, AIManager.js it is.
To start, I will create the AIManger.js file along the model of a JavaScript prototype library. Then add these relevant lines to the main.
// global variable definition
var aiManager;						// access the ai code
...
// in the wade load function
wade.loadScript('./AIManager10.js');
...
// in the startDemo function
aiManager = new AIManager();
...
// in the gameManager function
if (aiManager) { aiManager.dropFood(); }
In the main, the gameManger function gets executed at the frame rate (60 times/second). If I were to drop food at that rate, it would be a mess. So, I slow that down by setting up an interval and a chance. The default values work out to one in 50, which is a food drop about every second. I have set the code up so the interval and chance can be passed in the constructor. It would also be a good idea to implement setters and getters for these values so they can be modified while the game is running. I have not done that here, but it would be pretty easy to do.
if (Math.random() * this.interval <= this.chance) {
	console.log('drop food');
	this.addFood();
}
Next, I remove the addFood function from the main and put it in the AIManger file. It is basically the same code, except there are more randomized values regarding the horizontal starting location, fall speed and particle size. I also added a value attribute for the food particle. This value will be used to increment the stomach value if the worm eats it, so if it eats bigger particles it gets fuller faster. Earlier, I said I would add modifications to the falling path of the food particles, but this step is long enough, so it didn't make it here. It is left as an exercise for the reader.
One last modification I will make is to the default size of the worm segments. I will make the length and width of each segment sprite a little smaller, so there is more room to manuever the worm around on the screen.
This final version is the same code that is running at the top of this page. The relevant javascript code is in step10.js, segment10.js and AIManager10.js. Or more conveniently, you can download the whole thing as a zip.
Taking the segmented worm from my previous blog, it is now eating and growing. I hope you enjoyed this post.
This post was published here with permission from Shri of Ashatej Software.

